

Does your kitchen island feel dull, outdated, or like it just doesn’t fit the rest of your space? You don’t need a complete remodel to fix that.
A beadboard kitchen island is a simple way to refresh the look and feel of your kitchen without having to start from scratch.
In this blog, I’ll walk you through exactly how to add beadboard to your island, from the tools you’ll need to design ideas that match your style. If you’re considering doing it yourself or purchasing a ready-made option, you’ll receive clear answers and helpful tips.
By the end, you’ll know how to plan, build, and finish your project confidently. Ready to see what a weekend upgrade can do for your space?
What is a Beadboard Kitchen Island and Why Use It?
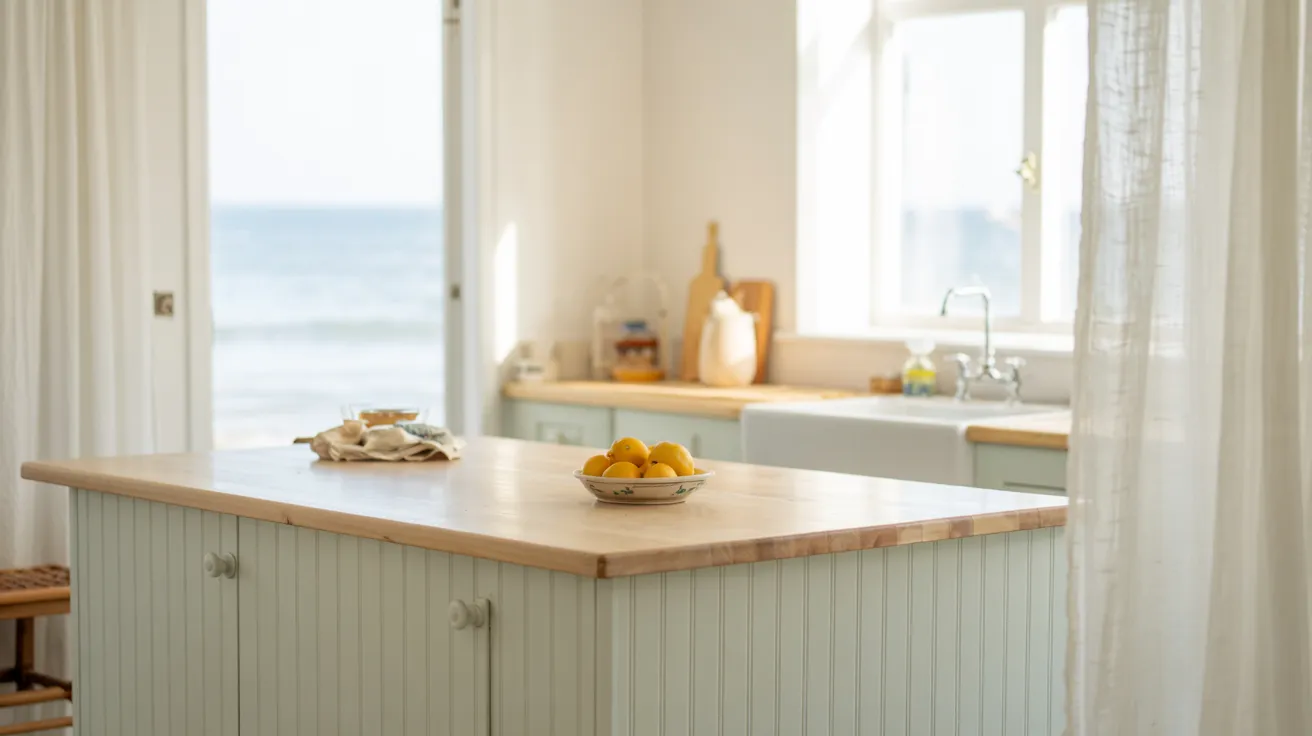
Beadboard is a paneling made of narrow vertical boards with grooves.
It offers a simple way to add character and texture to flat surfaces, such as kitchen islands, providing both function and visual interest without requiring major renovation work.
Benefits and Design Flexibility
Beadboard adds depth and order to plain surfaces, helping kitchen islands feel more structured. It blends well with many design styles and works if your kitchen leans traditional or modern.
It’s simple to install, paintable, and adaptable for small updates or full projects.
If you want a fresh coat of color or need a surface that hides light wear, beadboard makes updates easier without replacing the entire island.
Common Materials: MDF vs. Wood vs. PVC

Each beadboard material offers its own advantages, based on how much wear, water, and maintenance your kitchen island needs.
|
Material |
Details |
Best For |
|
MDF |
Made from compressed fiber, with a smooth surface, and is easy to paint. Needs sealing in humid areas. |
Budget projects, low-moisture kitchens |
|
Wood |
Natural grain, strong, and long-lasting. Can be refinished. Prone to warping if not sealed. |
High-end look, durable finishes |
|
PVC |
Moisture-resistant, non-porous, easy to clean. Fewer texture options than wood. |
Damp environments, low-maintenance homes |
How to Update Your Beadboard Kitchen Island
Beadboard can give your kitchen island a clean, upgraded look without major construction.
With basic tools, careful prep, and a weekend’s time, you can complete this update yourself. This section covers everything from prep to painting for a smooth project.
Tools and Materials Checklist
Before starting, gather everything you’ll need to avoid delays mid-project. Here’s a quick list to keep handy:
- Tape measure
- Circular saw or handsaw
- Jigsaw (for outlets or detailed cuts)
- Beadboard panels
- Trim pieces (corner and base)
- Construction adhesive
- Finishing nails or a nail gun
- Sandpaper
- Caulk and caulking gun
- Primer and paint
- Painter’s tape
- Safety gear (gloves, goggles)
- Cloth or brush for cleanup
Measuring and Planning Tips
Accurate measurements are the foundation of a well-fitted finish. Measure the height and width of each island panel, and record the measurements carefully.
Include space for any trim and mark around outlets or unusual edges. Double-check your numbers before cutting.
If your island isn’t square or has angled corners, take additional measurements and draw diagrams.
A small amount of planning up front helps reduce errors, saving both time and materials. Good prep keeps the final result even and aligned.
Step-by-Step Installation
Step 1: Cut your panels: Use a saw to cut your beadboard panels to size. If using PVC panels, they’re lightweight and easy to handle. You can also flip them over if you prefer a wider plank look.
Step 2: Apply adhesive and press: Use an instant-grab construction adhesive on the back of each panel. Press it firmly against the island surface. A grout float works well to apply even pressure across the panel.
Step 3: Attach trim pieces: Add corner trim and lattice trim to cover panel seams and give the island clean edges. This helps the entire project look more finished.
Step 4: Seal seams with caulk: Use caulk to seal the gaps between panels and along edges. This step helps prevent moisture from seeping behind the panels.
Step 5: Paint the surface: Once the panels and trim are attached, paint the entire island in your chosen color. The PVC surface is easy to wipe clean once dry.
Step 6: Optional reuse ideas: These panels also work great in bathrooms or bedrooms if you have extras or want to coordinate your design across spaces.
Want to see how it all comes together? Watch this quick video for a step-by-step look at the process in action.
Painting and Finishing Advice
Once your panels are attached and prepped, start with a primer if the panels aren’t pre-primed. This helps paint go on evenly and last longer.
Use a brush or roller and follow the vertical grooves. Apply thin, even coats and allow the surface to dry completely between layers. For extra protection, seal corners with caulk.
Use painter’s tape along adjacent surfaces for crisp edges. After the final coat dries, inspect for spots that need touch-ups. A smooth finish adds polish and durability.
Beadboard Kitchen Island Ideas for Every Style
Beadboard works in many types of kitchens, and the right combination of color, trim, and layout can shift the entire look.
If you prefer traditional charm or a clean, updated feel, these style ideas offer practical guidance for making your island suit your space and taste.
Farmhouse

For a farmhouse feel, use white or light gray beadboard paired with warm wood counters and open shelving.
Add simple corbels and wide trim for a more grounded appearance. This combination fits well with neutral cabinetry and soft lighting. It helps your island feel welcoming without being too showy, making it ideal for everyday spaces.
Coastal
To create a lighter look, go for pale blue, mint, or off-white beadboard. These soft tones mix well with sandy colors and clean finishes. Use minimal trim and keep the lines simple to maintain an open feel.
Coastal styling works well in small kitchens where brightness and airflow are essential.
Minimalist/Modern

Deep navy, charcoal, or black beadboard offers a strong visual base. Pair with slim trim and flat-panel cabinets. Matte paint is ideal for this application to maintain a clean and smooth surface.
Simple hardware like brushed metal pulls fits well. This layout is practical, low-maintenance, and ideal for those who want a sharp, clean look.
Vintage/Cottage
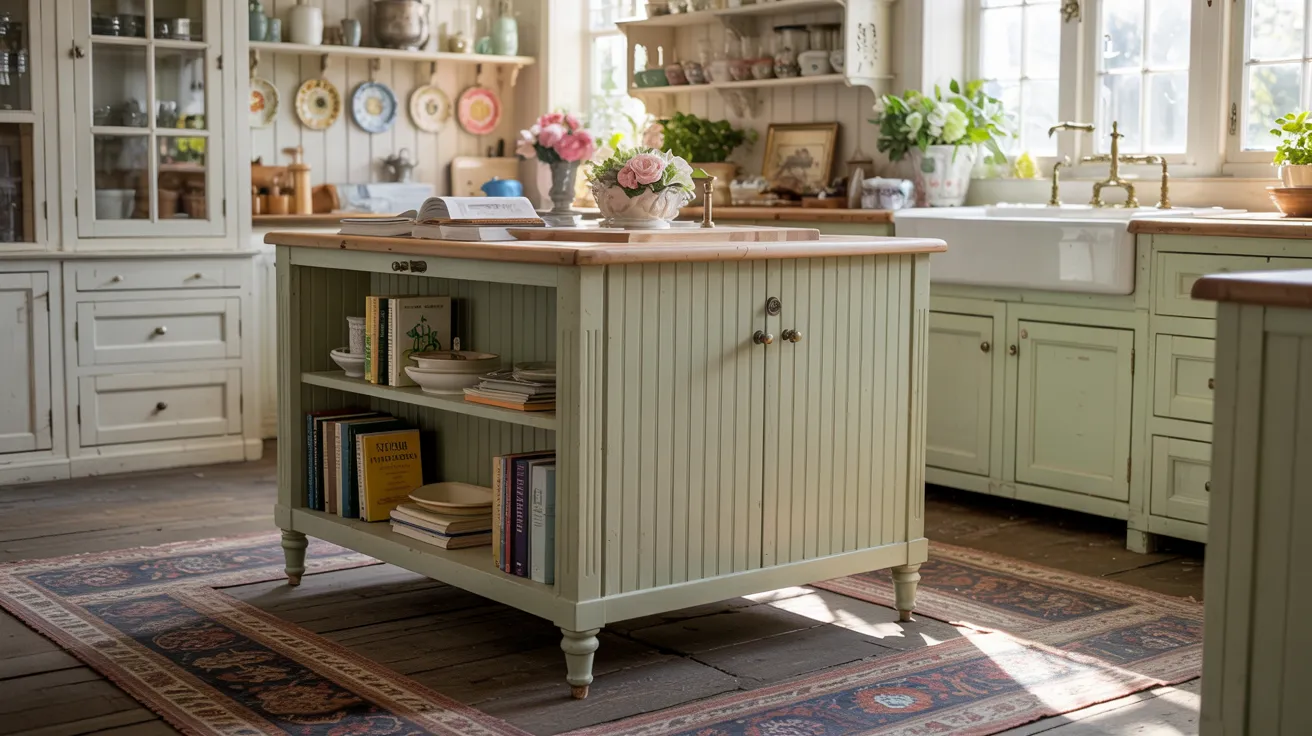
Soft pastel beadboard, like pale green, blush, or dusty blue, adds warmth without being overpowering. Combine with curved legs or corner posts and mix in open shelving or glass cabinet fronts.
Vintage knobs or pulls finish the look. This style offers a relaxed tone, ideal for older homes or kitchens with character.
Should You Buy or Do It Yourself?
Beadboard kitchen islands can be added as ready-made pieces or as part of a do-it-yourself upgrade. Choosing between these options depends on your time, budget, and the level of control you want over the final result.
Below are key points to help you compare both paths.
|
Option |
Pros |
Cons |
|
DIY |
Cost-effective, flexible design, and satisfying to complete |
Takes time, needs tools, and may require learning new skills |
|
Ready-Made |
Fast setup, less physical work, and often includes storage |
Limited size and color choices, higher price for quality materials |
|
Custom-Built |
Fits your space exactly, choice of materials, and layout |
Most expensive, longer timeline, must find a reliable contractor |
Each choice serves different needs. DIY suits weekend projects. Ready-made options are better for fast upgrades. Custom builds are ideal for specific spaces or needs.
Best Ready-Made Options
Here are some current ready-made beadboard-style kitchen islands available from major retailers:
StyleWell Bainport Kitchen Island: Available at Home Depot. Features include built-in drawers and open shelves. A practical choice for kitchens needing added storage and surface space.
August Grove Authements Island: Available on Wayfair. This island comes with a painted finish, beadboard-style siding, and a solid wood top. Includes cabinet space for enclosed storage.
Aurora Mills Beadboard Counter: Offered by Aurora Mills. Built with antique beadboard and an oak top. A strong choice for those seeking a distinctive, character-rich addition to their kitchen.
Each option offers different features in terms of size, layout, and finish. Before purchasing, it’s helpful to review specifications, measurements, and customer feedback to ensure the piece fits your space and needs.
Custom Build Considerations
A custom island is the best choice if your kitchen has unusual dimensions or if you want specific materials.
Local carpenters can match your existing cabinets or add features like electrical outlets or built-in seating. Ask for a precise quote and a timeline.
Always check samples or photos from previous builds to confirm their work style fits your vision.
Maintenance & Durability
Beadboard islands are easy to keep in good shape with basic care. Regular cleaning and minor touch-ups go a long way.
- Wipe surfaces with mild soap and water. Use a soft cloth to avoid scratches.
- Dry grooves thoroughly after cleaning to prevent moisture buildup.
- Seal joints and edges with caulk during installation to block water entry.
- Check the base and corners for chipping or soft spots and fix them early.
- Lightly sand and repaint as needed to refresh the surface.
- Keep mats near sinks or prep areas to prevent standing water.
- Use moisture-safe materials like PVC in humid kitchens for added protection.
Conclusion
A beadboard kitchen island can totally shift the look and feel of your kitchen, without taking too much time or money.
With a few tools, some planning, and a little patience, I’ve found it’s one of the simplest ways to make a big difference.
You might paint it, add trim, or pick a ready-made island—this guide got you through each step to help you get it done right.
Use what you’ve picked up here to shape a kitchen that fits your life and looks the way you want it to.
If you’re ready to keep making changes, take a look at my other kitchen DIY ideas and tips. There’s always one more easy project to try.